Using your compass
MONOCHROME RANGE
We are going to fill the fourth table with a monochromatic range, this means that we are going to play with the darkness and luminosity of a color.
Choose a color among the primaries; yellow, magenta, or blue; or between the secondary ones; green, purple or red.
Watch the first turorial:
1. Monochrome
After this we are going to do the artistic application:
HOW TO CREATE A SENSATION OF DEPTH
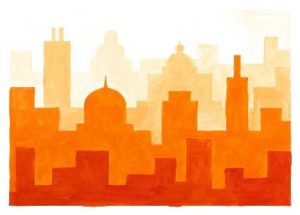
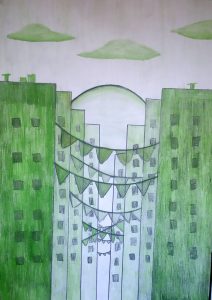
We are going to choose a color, and we are going to make a monochrome range. For them we are going to paint the middle box with the pure color, for example blue, from left to right we are going to press the pencil less and less until we reach white. This strip of colors is brighter than the other. From right to left we are going to press the pencil more and more and we are going to mix it with pencil 2b, to darken it even more. With this strip of colors we are playing with color saturation, the more mixed the color the less saturation it will have. If the color is purer, it is more saturated and if it is more mixed it will be less saturated. We can apply the monochrome color table to create a feeling of depth, for example in a landscape with mountains located at different distances. If we replace the mountains by buildings we get an urban landscape.


This drawing is a good example of the monochrome range made by a student:

Watch this tutorial:
2. Artistic application monochrome I attached a word document with the same instructions: How to create e sensation of depth
Grey scale
We will see these two tutorials:
The first one is to make 5 boxes on a sheet, can be on a scketchbook sheet or on a normal sheet.
The second one is to learn how to make a grey scale.
The painters and draftsmen use the gray scale to give a feeling of three-dimensionality and volume to the two-dimensional drawings they make on paper or canvas, the examples are endless.
In this activity we will first draw a cube on a blank sheet and we will shade it to give it more volume and realism.
After the cube, which has planes and edges, we will move on to the sphere, whose surface is smoother. Giving volume to a smooth surface is more complicated, so I put it second.
Watch the tutorials in this order:
1. Doing a margin on the sheet. This is the first one because you have to do a margin on your sheet.
2. Shading a cube
3. Shading a sphere
Remarkable points and straight lines in a triangle
Watch this presentation about the remarkable points and straight lines in a triangle, and then watch the tutorials.
You have to see them in this order:
1)Circumcenter
2) Incenter
3) Barycenter
In the three remaining boxes you have to do:
- Draw a scalene triangle with free measures and trace its circumcenter.
- Draw a right triangle with free measures and trace its incenter
- Draw an equilateral triangle with free measures and trace its barycenter.
Triangles 2º
We are going to build triangles from some information about their shape. First of all, do a margin on your sheet and divide it into 6 equal parts 0.
Dividing a sheet into 6 equal parts (optional)
Before starting, you have to see the presentation about the triangles and then see the 3 tutorials in this order:
1. Triangles 1: Contruction of a triangle knowing 2 sides and one angle
2. Triangles 2: Contruction of a triangle knowing 2 angles and one side
3. Triangles 3: Contruction of a triangle knowing 3 sides
You have to do these 3 activities:
1. Draw one triangle knowing 2 sides and one angle: AB=8cm; AC=6,5cm and A=30º
2. Draw one triangle knowing 2 angles and one side: AB=7cm; A=30º and B=60º
3. Draw one triangle knowing 3 sides and one angle: AB=7,5cm; AC=4cm and BC=7cm
DOING A MARGIN ON THE SHEET
Parallels
Segments
Watch the video to understand the difference between line, semiline and segment.
When you finish watching the video, do the activity that I propose. Do this activity on a sheet of paper, not in the sketchbook.
Practice yourself:
- Draw 4 segments:
- 7 cm
- 80 mm
- 4,5 cm
- 6,7 cm
COPY A SEGMENT
